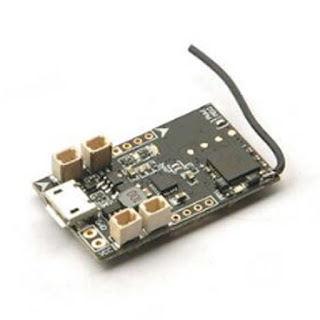
Eachine DSF3_EVO_BRUSHED FC Built-in DSM2/DSMX Satellite Receiver For Eachine QX95 QX90 QX90C

SPECIFICATION
-
Item Name: DSF3_EVO_BRUSHED Flight Controller Built-in DSM2/DSMX Receiver
Brand Name: Eachine
Item NO.: QX958DS
Dimension: 33mm*22mm*
Thickness: 1.2mm
Processor: STM32F303 72Mhz
Gyro Accelerometer: MPU6500
Built-in Receiver: DSM2/DSMX Compatible Satellite Receiver 6CH PPM
Default Receiver Channel Map: TAER1234
Default Unlock Channel: AUX1(Channel 5)
Firmware: SP RACING F3 EVO 1.13.0
Support work voltage: 3.6/4.2v (1S Lipo battery)
Coreless motor plug: SH1.0
Weight: 3g (With motor plug)
Weight: 2g (Without motor plug)
Package included:
1 x DSF3_EVO_BRUSHED Flight Controller
***
- Come with or without motor plug ( JST SH: 1.0 ).
- Support all of transmitter base on DSM2 protocol.
- Large and high quality current NMOS transistors, operating current of up to 10A or more.
Avoid AIO/PPM DSMa/x FC boards! The orientation of the GYRO may vary depending on Betaflight's version.
The Rx are unspeakable. Forget 1000/2000 as " range ". It is not full range AND it fluctuates.
In short, it's hard to tell whether they work or they don't BUT they are BS for sure!
USB port on the side rather than the back would probably be better and Boot pin is as follow...

A. Board Alignement
Pay attention to board alignement in cleanfligt/betaflight. Sensors aren't correctly set with some betaflight's versions

B. Receiver configuration
*** By default just set receiver mode to PPM_Rx_Input then bind.
B.1 DSM2/DSMX [ EXTERNAL ] Receiver:
- Enable Serial RX for UART3 from the ports tab in Cleanflight/Betaflight configurator.
- Set Receiver mode to RX_SERIAL - Select SPEKTRUM1024 for DSM2 Radio or SPEKTRUM2048 for DSMX Radio.
B.1.2 Bind Procedure
- From CLI tab type "set spektrum_sat_bind = 9" for DSMX or "set spektrum_sat_bind = 5" for DSM2.
- Type "save" and Flight controller reboot. Disconnect USB cable
- Wait a second then reconnect the USB Cable. Transmitter should be turned on while pressing the bind button.
- After cold start satellite LED ( Orange color LED ) should start blinking.
- Bind as default with your Radio.
- After binding satellite LED should be solid.
- Connect Cleanflight/Betaflight and use receiver tab to test that satellite is working correctly.
- If Ok then final step is to go to CLI tab and type "set spektrum_sat_bind = 0"and then type "save". This must be done so that satellite doesn't go back to binding mode when the Flight controller is repowered again.
Note:
If motors start to spin when you connect a battery, in configurator:
- Go to Configure Tab and set ESC/Motor protocol to BRUSHED.
- Go to the CLI tab, type "Set motor_pwm_rate=1000", then enter save.
C. Cli Configuration Sample
name DSF3EVODSM2
feature -TELEMETRY
feature -RSSI_ADC
feature -TRANSPONDER
feature -AIRMODE
feature -ANTI_GRAVITY
feature MOTOR_STOP
feature RX_PPM
set gyro_sync_denom = 2
set mag_hardware = NONE
set baro_hardware = NONE
set serialrx_provider = SPEK2048
set use_unsynced_pwm = OFF
set align_board_yaw = 180
# Set motor_pwm_rate frequency from 1000 to 32000 ( 32kHz = soft over power )
set motor_pwm_rate = 32000
# min_check SHOULD exceed min_throttle
set min_check = 1006
# min_throttle SHOULD BE determined
set min_throttle = 1000
set min_command = 1000
set max_throttle=2000
set max_check = 2000
set pid_process_denom = 1
set gyro_1_sensor_align = CW0
D. Filter Configuration Sample

Without connector
With connector
DOWNLOAD
- DUMP
- 20160606_CFL_F3EVODSM2_SPRACINGF3EVO_1.13.0_ORG.txt
- 20190531_CFL_F3EVODSM2_SPRACINGF3EVO_3.5.0.txt
- 20210310_BTFL_F3EVODSM2_SPRACINGF3EVO_4.0.6_FRESH.txt
- 20210316_BTFL_F3EVODSM2_SPRACINGF3EVO_4.0.6_DIFF.txt


